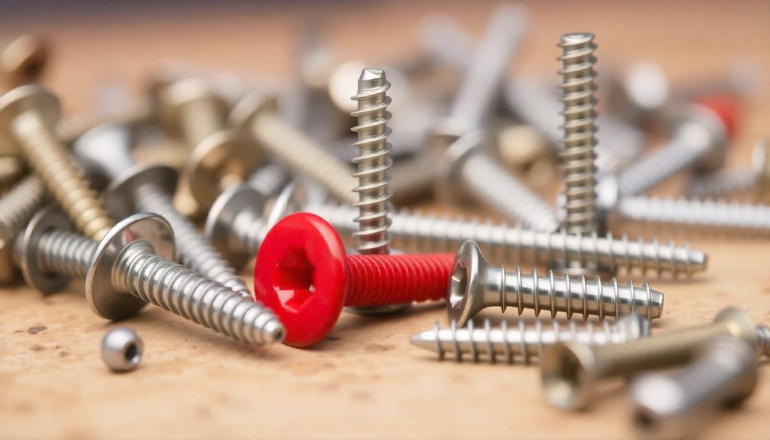
A screw is a simple yet reliable way to join components. Let’s take a closer look at fastening techniques and the diverse types of screws available.
I built my first CNC router almost 20 years ago, pouring all my precious savings into decent stepper motors and their control systems. In a naïve flash of inspiration, I decided to save money on the lead screws, buying cheap M12 threaded rods from a DIY store instead of expensive trapezoidal threaded rods.
Although my controller could compensate for the backlash fairly well and the CNC ran acceptably smoothly on the first day (with plenty of bearing grease), by the second day the threads had seized, twisting the portal in on itself. Today I know that using trapezoidal threaded rods would have prevented this disaster.
Quick Overview
- Understand materials, designs, thread types, etc.
- Nerdy facts about naming screws, rust prevention, and drive profiles
- Solutions for stripped screw heads
Alongside thread form and pitch, factors like material, drive type, any needed security against loosening, and many others all play an important role in choosing screws or threaded rods—potentially preventing costly mistakes. To help you avoid mishaps like mine when I built my first CNC machine, here’s an overview of the key points to consider when selecting the right screws and threaded rods.
Strong Mechanical Interlock
Fastening technology generally distinguishes three types of joint:
- Frictional Joint: Here, frictional forces come into play (as in a pair of pliers or a wedge), as well as magnetic or suction forces.
- Positive (Form-Fit) Joint: A form-fit connection is determined by geometry, as with puzzle pieces, dovetail joints, or the use of a pin.
- Material Joint: Gluing or soldering creates a chemical or atomic bond. This is typically considered non-detachable, although solvents or reheating can often separate the parts in practice.
Screws form a positive (form-fit) joint via their threads. They can be moved axially by turning, and friction arises at the threads: in a wood screw, the fibres are displaced; in a machine thread, metal rubs against metal. Since friction adds extra force, screws combine positive and frictional joints. In long wood screws, the increasing friction is quite tangible: with each new turn of the thread, more wood fibres must be pushed aside, pushing a cordless driver closer to its torque limit.
Deep threaded holes in metal are uncommon, and inserting a screw there usually shows little additional friction. In fact, a properly matched nut spins onto the thread with ease—there’s physical play in the thread. Only when the screw is tightened does it generate the required friction for the frictional joint.
Thread Types: Fixed or Moveable
Partial-thread screws only have a thread on part of their total length. The unthreaded part allows the top (loose) component to be drawn against the bottom (fixed) component via the screw head—no need to clamp them first. However, when securing thin materials, uneven distribution of force may lead to cracks (especially in plastics).
If components are exposed to varying loads, for example on stair treads, a partial-thread screw can loosen over time. Combined with wood’s tendency to shrink or expand, this can create a gap between tread and substructure; with each step, the part rubs against the screw shank, causing the dreaded squeaks.
Full-thread screws have a thread running from tip to head and are a better choice where a strong tensile hold is needed—say for a hook or high-tension fixture. They distribute forces better, which can help avoid squeaking floors. If necessary, you can even create a gap between parts using full-thread screws. That said, installation can be trickier, because you might need to clamp the pieces tightly to achieve a flush fit. A full-thread screw has a narrower shaft than a comparable partial-thread screw, so it’s more susceptible to shear forces.
If You Need a Firm Hold: Metric Threads
The metric ISO thread (also called a standard, machine, or metal thread) is defined by the international ISO 261 norm and denoted “M” followed by the outer diameter in millimetres—for instance, M6. Along with diameter and angles, the thread pitch is also defined. Pitch refers to the distance between two thread crests; for an M6 screw, that distance is 1 mm, meaning one full 360° turn moves the screw 1 mm along its axis.
Fine-pitch threads have an even smaller pitch. Under ISO 261, for example, M6 can be specified as MF6 × 0.75 (a 0.75 mm pitch). Other fine pitches exist too, so always check the exact figure when purchasing.
The advantage of a fine thread is that the closer-spaced threads can transfer more force. Such threads are also good for fine adjustments—if you need increments of 0.1 mm for stops, limit switches, or precise positioning, a fine-pitch thread might be ideal.
If You Need Smooth Operation: Trapezoidal Threads
Whereas a metric ISO thread has an isosceles triangle profile and is primarily intended to clamp or fix parts, a trapezoidal thread is trapezoid-shaped and designed for smooth, near-backlash-free motion. Commonly found in a workbench vice, fruit press, or 3D printer, trapezoidal screws can transmit substantial force and move significant distances per turn if they have a large pitch. The big cross-section can handle high loads.
Rare Thread Types and Left-Hand Threads for Special Cases
Imperial (Whitworth) Threads—sometimes referred to as British Standard—along with left-hand threads are less common but worth knowing about. If a screw refuses to engage properly—even though its diameter seems correct—you might be dealing with a product labelled “Made in England” or “Made in the USA,” which often use imperial threads. A 1/4-inch screw (6.35 mm) might have a 1.25 mm pitch, while an M6 screw (6 mm diameter) has a 1 mm pitch, so confusion is easy.
Imperial screws are typically specified by three parameters: diameter, thread pitch, and length. Common diameters include 1/4″, 1/2″, and 3/8″. Pitch can be coarse (e.g. 20 threads per inch, marked as “1/4″-20”) or fine. The length, also measured in inches, is simply appended (e.g. “1/4″-20 × 1″”).
Left-hand threads feature the same pitch as equivalent right-hand versions but tighten anti-clockwise. You’ll encounter them on a bicycle’s left pedal, the chuck-fixing screw in a drill, or the blade bolt of a circular saw. Their direction of rotation ensures they self-tighten during operation rather than come loose—something very comforting with a spinning saw blade. They’re also used for gas hose connections to prevent dangerous mix-ups with water hoses and to avoid unintentional loosening.
Screw Length and Screw Drive
Measuring Screw Length: Head to Tip
Because countersunk screws can be fully recessed, their entire length is measured. For a cylindrical-head screw, only the distance from tip to the underside of the head is counted. When working in wood, a rough guide says the screw’s length should be at least 2.5 times the thickness of the component you’re fastening; in metal, at least 2.5 times the screw’s thread diameter is advised.
Drive Types: From Slot to Torx
A slotted screw is a classic design and remains popular for aesthetic reasons. Many of us, however, have learned the hard way that its two-point contact means your screwdriver or drill bit can easily slip out, damaging the screw head.
Over time, drive profiles have evolved to distribute force more evenly and reduce stress points. From the simple cross-head screw—subdivided into Phillips (PH) and Pozidriv (PZ)—to hexagonal (external or internal, e.g. Allen keys) and Torx (TX), designs aim to multiply the number of contact points and minimise slippage. XZN (multi-spline) goes even further, distributing force over 12 contact surfaces.
Besides security screws with specialised heads or the Robertson square drive commonly used in North America, most European screws fall into the profiles mentioned. Some manufacturers, such as Würth with their ASSY screw, have slightly modified proprietary designs reminiscent of Torx.
Material and Joint Durability
INOX, Plastic, and Brass
In addition to thread and drive type, screw material is crucial. Zinc-plated screws are common and handle moderate mechanical loads. Chrome-plated screws offer increased corrosion resistance. For outdoor use, stainless steel screws are often used to avoid rust, although contact with regular steel can lead to galvanic corrosion. Stainless steel screws are also more brittle, so pre-drilling and careful tightening are essential—especially in hardwood. The same is true of brass screws, which you should generally only tighten by hand. Lubricating threads with a little oil or soap can help reduce friction.
Plastic screws are mechanically weaker but corrosion-proof and very light. They’re popular in model building and handy for woodworking jigs: if your router or circular saw accidentally hits them, the plastic can be cut without sparks or shattered carbide teeth.
Keeping Screws Tight
Once tightened, a screw should ideally stay tight. Vibration can, however, loosen a screw joint. One solution is to maintain tension on the threads with a spring or split (lock) washer so that friction is constant. In most cases, the screw can still be removed if needed.
Another approach is a threadlocking fluid (e.g. Loctite). A blue, medium-strength variant bonds the threads but can still be undone with enough force, allowing adjustments. A red, high-strength variant is meant for permanent fixtures, typically where large torque or vibration is present—loosening could have catastrophic consequences. Heating the joint to around 260°C can break the bond.
Removing Stuck Screws
Understanding friction and force transmission may ease your frustration when facing a seized or rounded screw. First, reduce friction as much as possible. Penetrating oil (“creep oil”) applied near the screw head should be given time to soak in. Even if rust isn’t the culprit, “freezing” sprays can help by quickly cooling the screw, making it contract and thereby losing some grip.
If the head is already stripped, check your tool: if the bit itself is worn, replace it to avoid ruining future screws. For small screws with large heads, I’ve had success cutting a new slot with a thin cutting disc or a fine saw. Ensure the screwdriver then sits snugly—light taps with a hammer can help secure it.
The internet sometimes suggests placing a wide rubber band between bit and screw head. In practice, this rarely works well. A more reliable method is to use a screw extractor. These are sold in small sets for around 10–15 euros. Depending on the design, they’re part drill bit, part tap. Set your driver to a low speed, press down firmly into the damaged head, and the extractor will wedge in. You can then slowly unscrew it.